Draw a seating chart
your event has assigned seats and you want buyers to choose their exact spot from a map of the room.
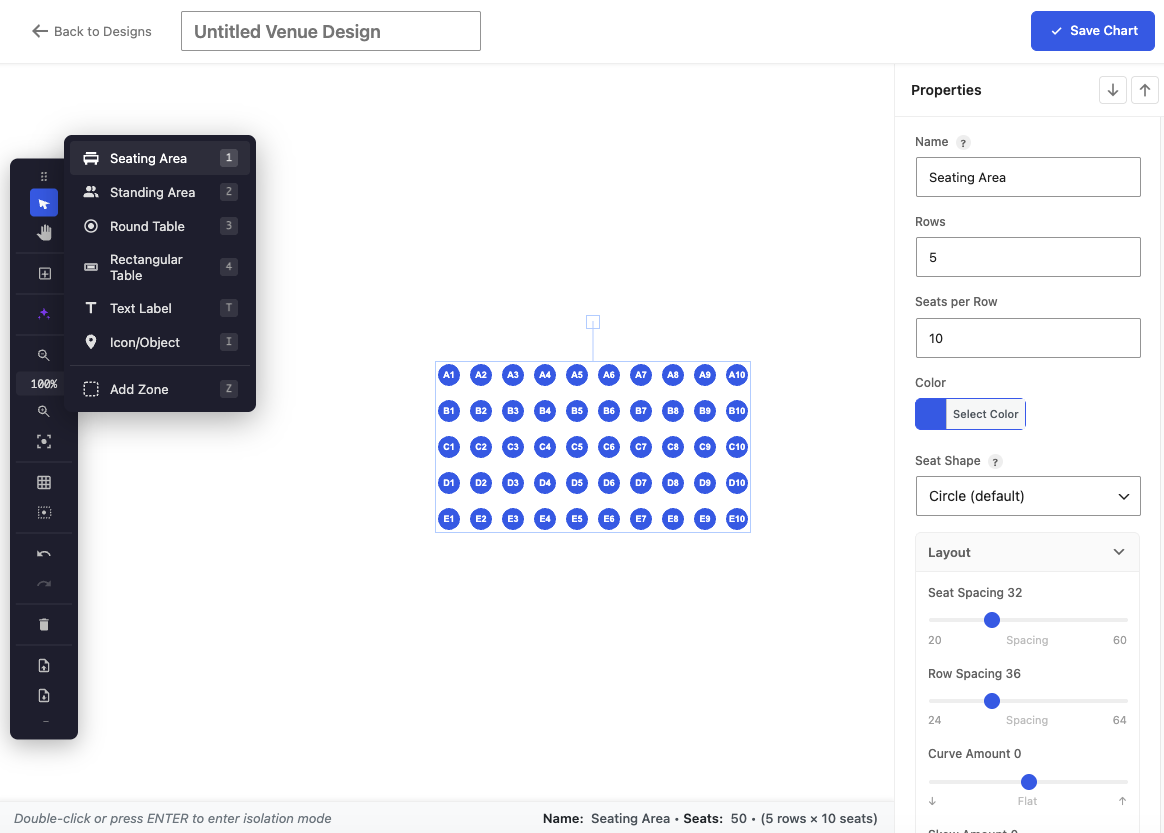
The Venue Designer lets you draw any room once, then attach it to events so buyers pick their exact seat. The editor is a visual canvas – you place rows, seats and areas by hand and it stays crisp at any zoom level.
Create a venue
- Go to Venuera → Venue Designer and create a new venue.
- Add a row of seats and set how many seats it has; duplicate and arrange rows to match the room.
- Label rows and seats (Row A, seat 1…) so the labels match what’s physically on the chairs.
- Save the venue. It’s now reusable across events.
Attach it to an event
On the event (or its ticket), select the venue. Buyers then see the map on the event page and pick a seat; the chosen seat is stored on the ticket and printed on it. Sold seats show as unavailable in real time.
Fine-tune a section in isolation mode
Double-click a seating area or table to enter isolation mode: the rest of the map dims and you can work on that section’s seats individually. Drag a seat to reposition it, select a seat and press Delete to remove it, or double-click a single seat to edit its label (handy for a one-off seat number or an accessible space). Click outside the section to exit – your changes are kept.
It scales to the room
Seats and labels render as live vectors, so a 60-seat studio and a 2,000-seat theatre both stay readable. For very big rooms there’s an overview mode to navigate quickly.
Next step
Add non-seated areas with zones & standing areas.